| һ��Debug Sampler���ܣ�
ʹ��Jmeter�����ű�ʱ��������Ҫ���ԣ���ʱ����ʹ��Jmeter��Debug Sampler����������ѡ�JMeter
properties��JMeter variables��System properties:
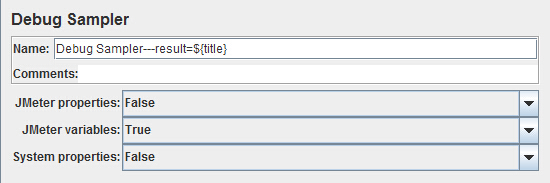
1��JMeter properties��System properties��ͨ����ѡfalse������������JMeter��ϵͳ�����ԣ���Jmeter��bin��jmeter.properties�ж��壬һ�㶼����䡣
2��JMeter variables��������������Ѷ���ı���������ķ�ʽ��������Щ��
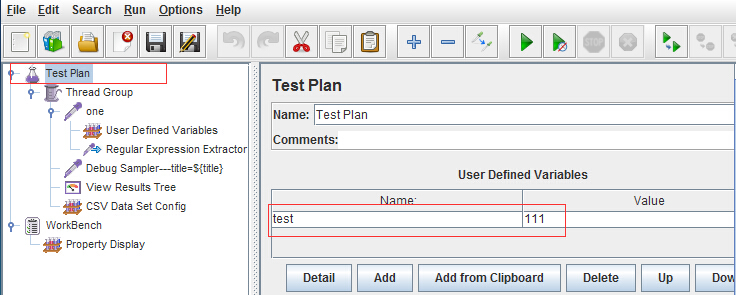
a) ѡ�в��Լƻ�(Test plan)�����ұߵ����������User Defined Variables
b) ѡ���߳��飬�Ҽ�ѡ�� ����Ԫ��( config element)�C>User
Defined Variables
c) ͨ�����ô��������ɵı������ɲο��ҵ���һƪ��Jmeter����
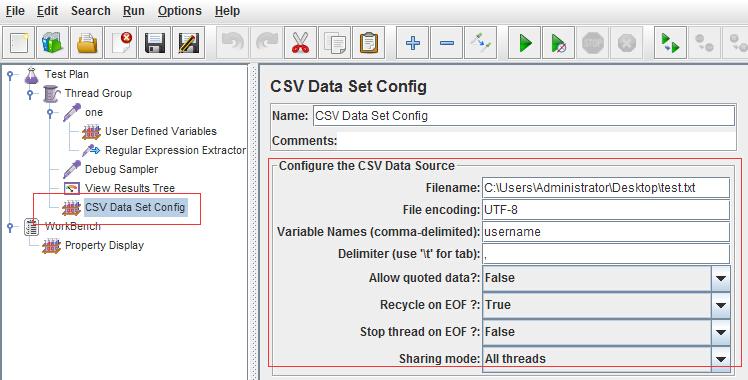
d)ʹ��csv�������ı������������ɲο�����һƪ��Jmeter������
�����ۺ�ʾ����Ϊ�˺����������������������д���½ű���
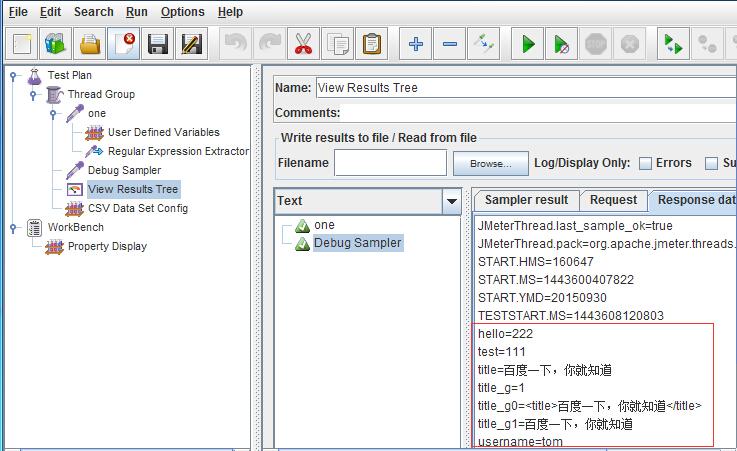
1����Test plan�Ҳ�������ӱ�����name=test��value=111
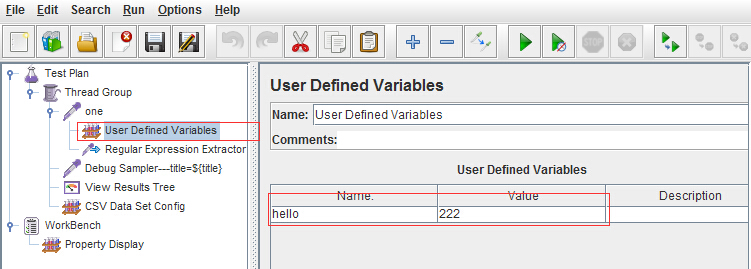
2����sampler one(���ʰٶ���ҳ)������һ���û�������name=hello��value=222
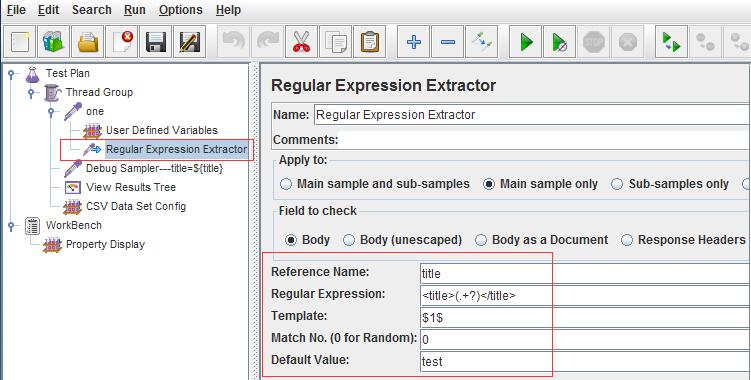
3����sampler one ��ʹ�ú��ô��������������ʽ������������ȡ�ٶ���ҳtitle����Ϣ
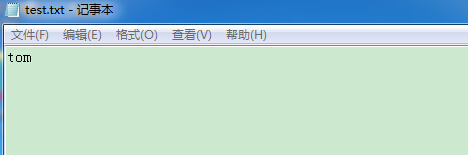
4����������������Ϊusername��ֵΪ��tom
5��������
�����ܽ
1��Debug Sampler��������Զ���ı��������response data�У��������ǵ��Ե�ʱ��ʹ��
2������ʽִ�нű�ʱ��Ҫɾ��Debug Sample
PS��Jmeter��һ�ֵ��Թ��ߣ�HTTP Mirror Server |