| ʲô��TestNG
TestNG��һ������ǿ��IJ��Կ�ܣ���Junit��һ����ǿ�汾��Junit��ʹ�ö���֮ǰ��TestNG����Ч���ڡ�NG
��������һ������
TestNG����ṩ�����¹��ܺͽ�����ǵ����⣺��Ϊʲô������ҪTestNG����
ע�Ϳ�������������֯ʹ���Ը����ס�
���IJ������á�
���������Ը����ؽ��з���
����ʹ��TestNGʵ�ֲ��Բ���
֧��������������
���õı���
Eclipse��װTestNG
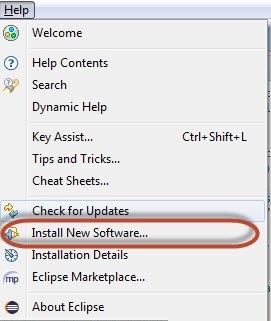
��1��������Eclipse��ѡ��Install New Software����
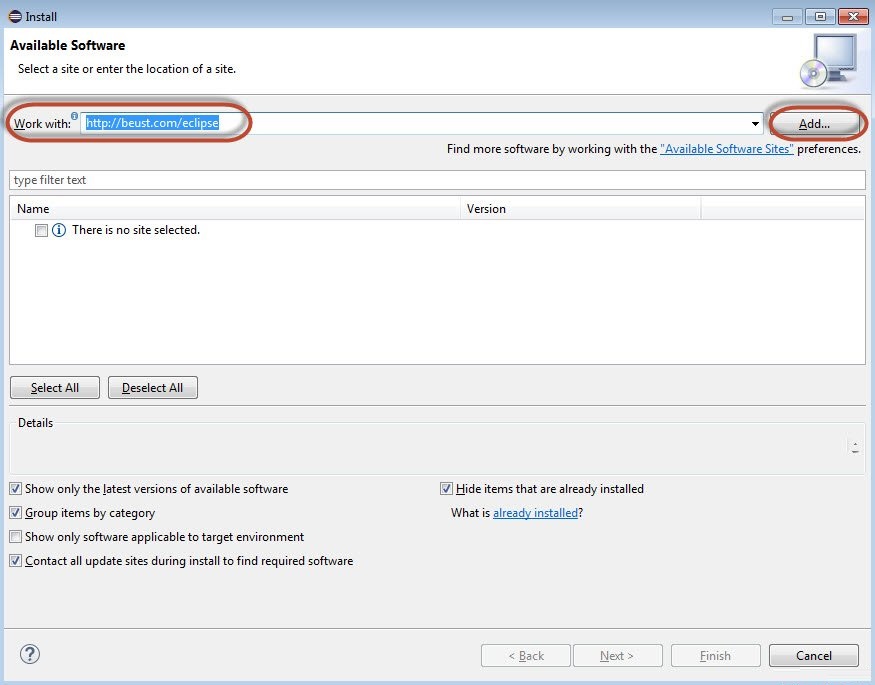
��2����������ַΪ��http://beust.com/eclipse����Ȼ����Add����
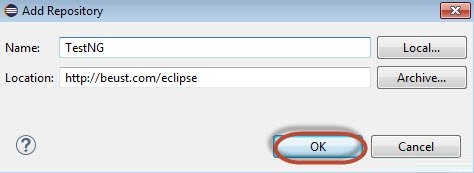
��3���������Ӵ洢��Ի�����������Ϊ��TestNG����Ȼ������OK��
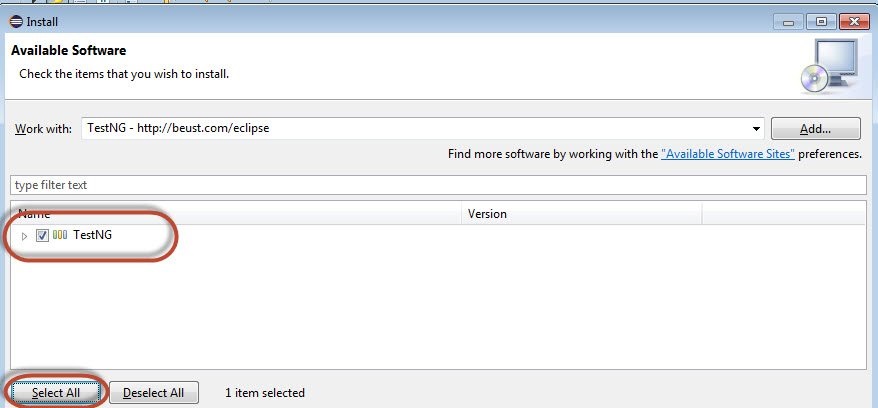
��4���������ȫSelect All���͡�TestNG������ѡ����ͼ��ʾ��
��5���������Next��������
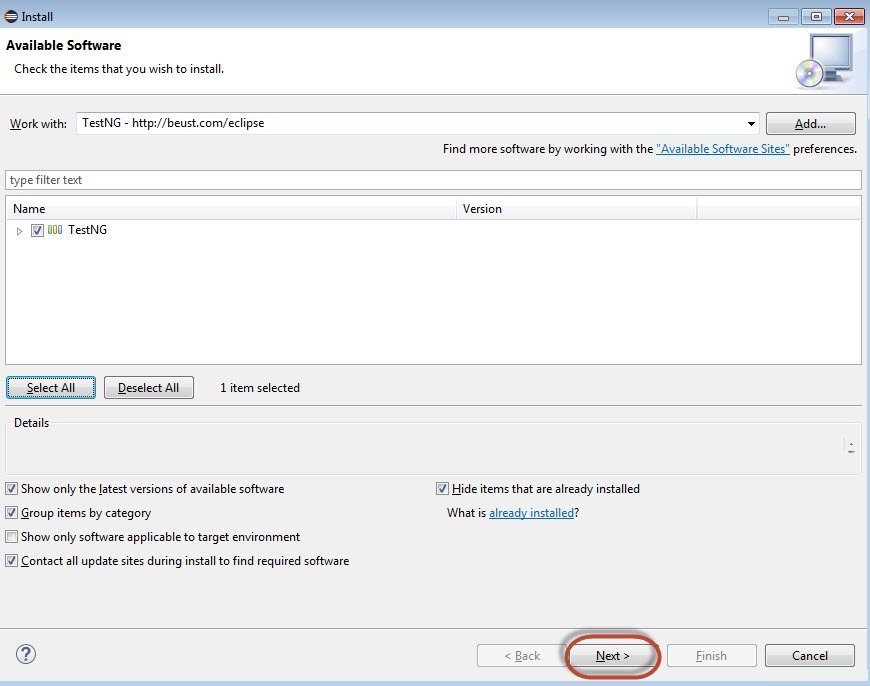
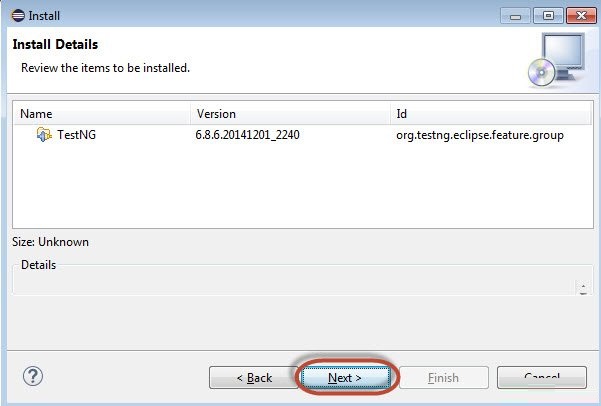
��6������鱻ѡ����Ŀ��Ȼ����Next����
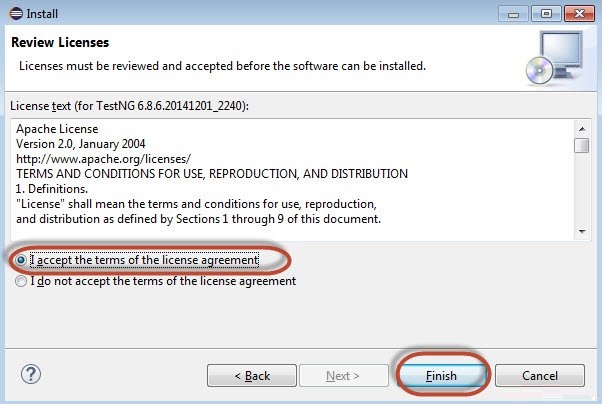
��7������Accept the License Agreement����Ȼ����Finish����
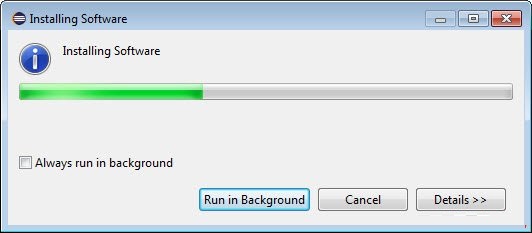
����8��TestNG��ʼ��װ���ҽ�ʾ���������¡�
��9������ȫ���浯������������Ч�Բ��ܳ�����������Ok����

��10������װ������������������Yes����

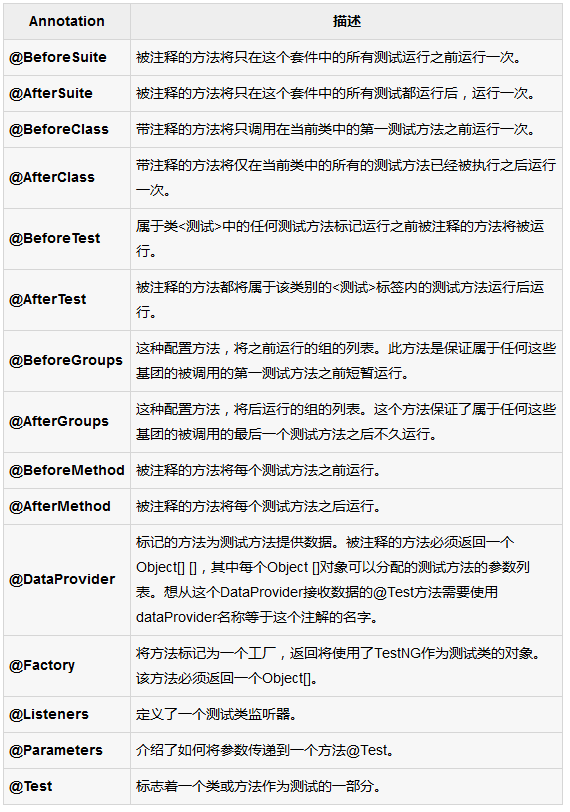
TestNG��ע��
ע�ͱ���ʽ���ӵ�Java������JDK5��TestNG������ѡ��ʹ��ע����ע������ࡣ������һЩʹ��ע�͵��ŵ㡣�������TestNG�����������ҵ�
www.yiibai.com/testng/index.html
TestNGʶ����ͨ������ע����Ȥ�ķ�������ˣ����������Ʋ��������κ�ģʽ���ʽ��
���ǿ���ͨ������IJ�����˵����
ע����ǿ���ͣ����Ա��������־�κδ���
���������Ҫ��չʲô�������������ѡ��JUnit3����
Eclipse��װTestNG
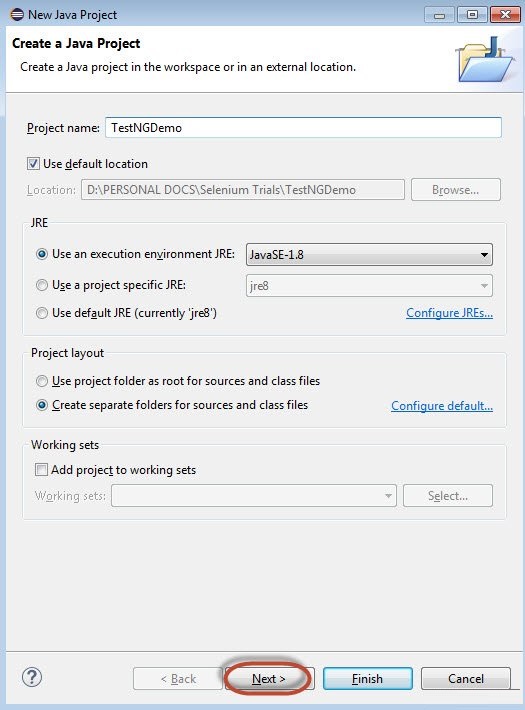
��1��������Eclipse��������һ����New Java Project��������ͼ��ʾ��
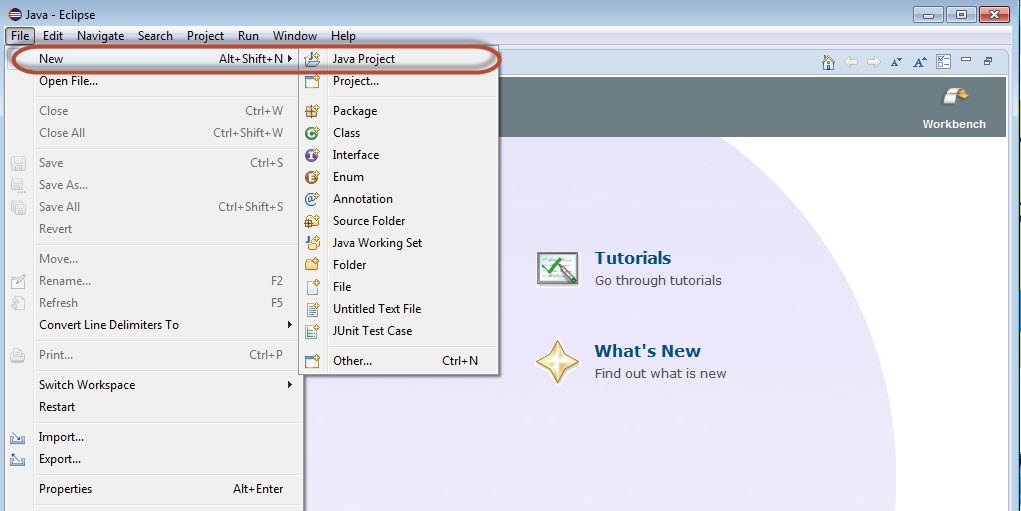
��2����������Ŀ���ƣ�Ȼ����Next����
��3�����ҵ���Libraries��ѡ�������������SeleniumԶ�̿��Ʒ�������JAR�ļ���Add
External JAR's������ͼ��ʾ��
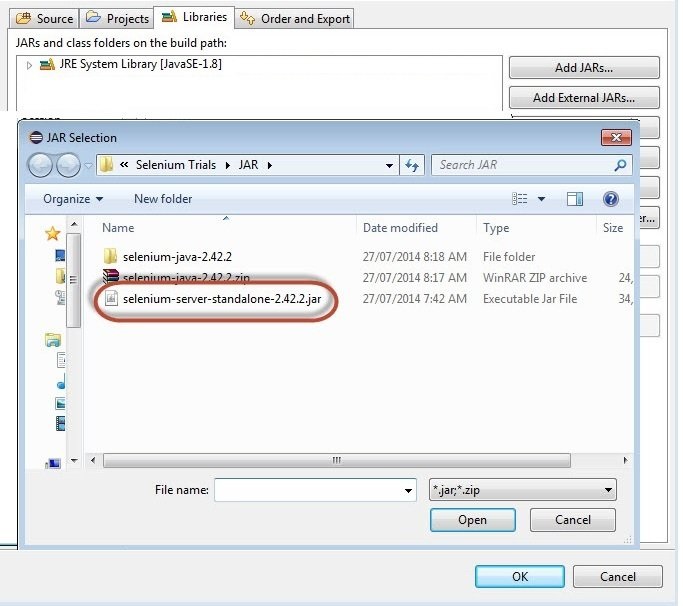
��4��������JAR�ļ�������ͼ��ʾ��Ȼ����Add Library����
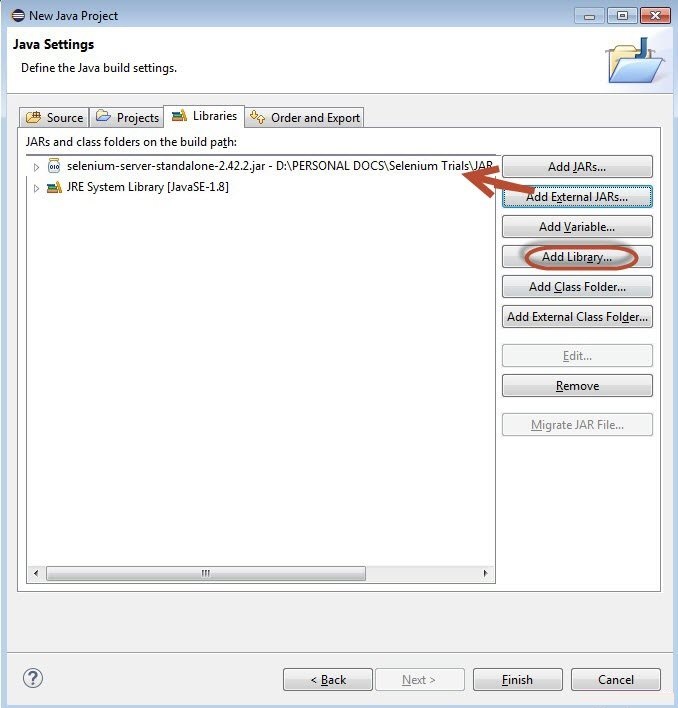
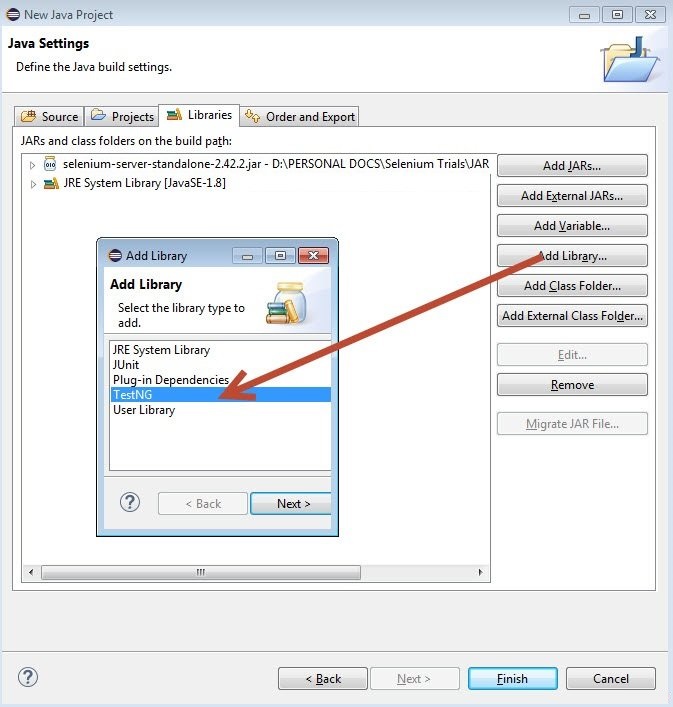
��5������Add Library���Ի����ѡ��TestNG����Ȼ������Next���ڡ�Add
Library���Ի���
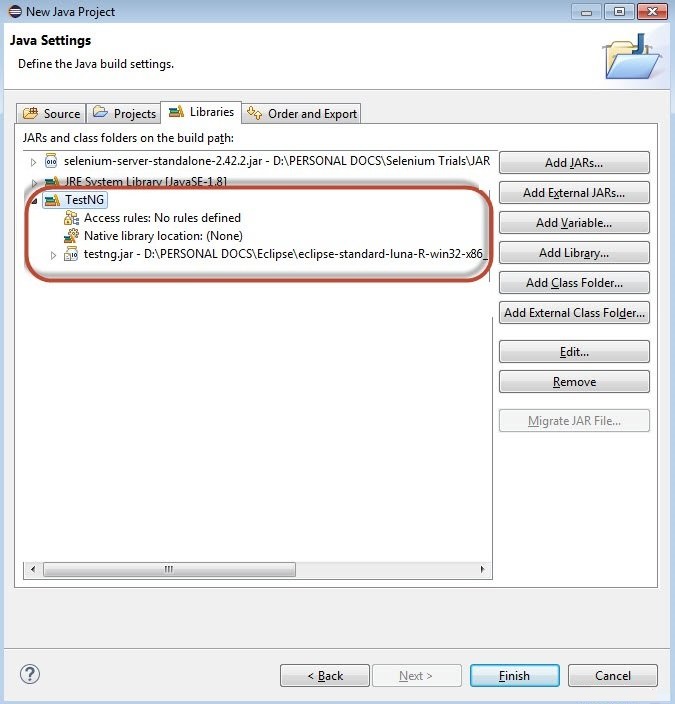
��6�������ӡ�TestNG������������ͼ��ʾ����ʾ������
����7����������Ŀ�Ľṹ����������ʾ����Ŀ��

��8�����Ҽ������src���ļ��в�ѡ��New���͡�other����
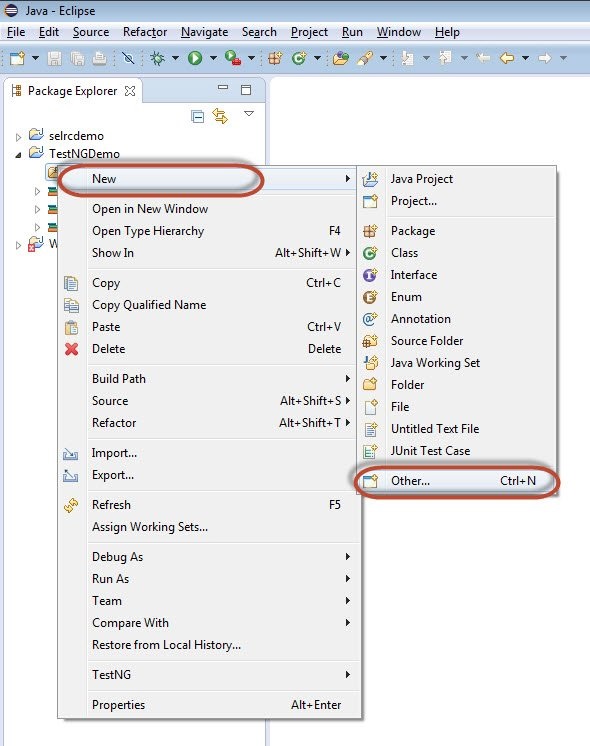
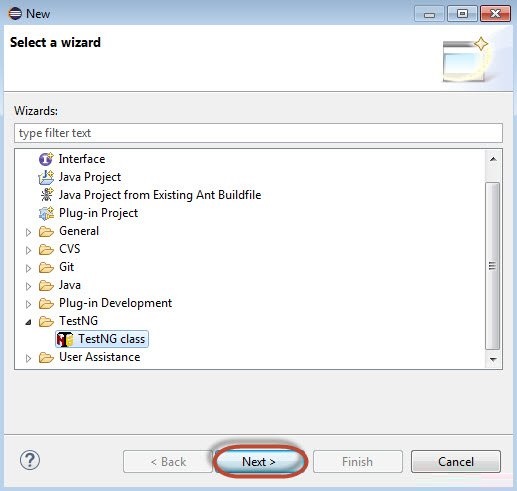
��9����ѡ��TestNG����Ȼ������Next����
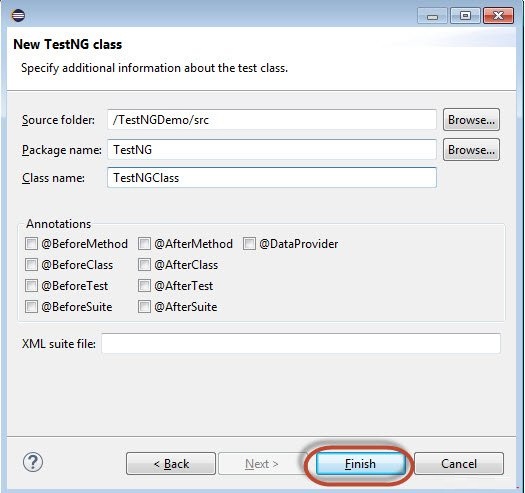
��10����ѡ��Source Folder�����ƣ���������Ok����
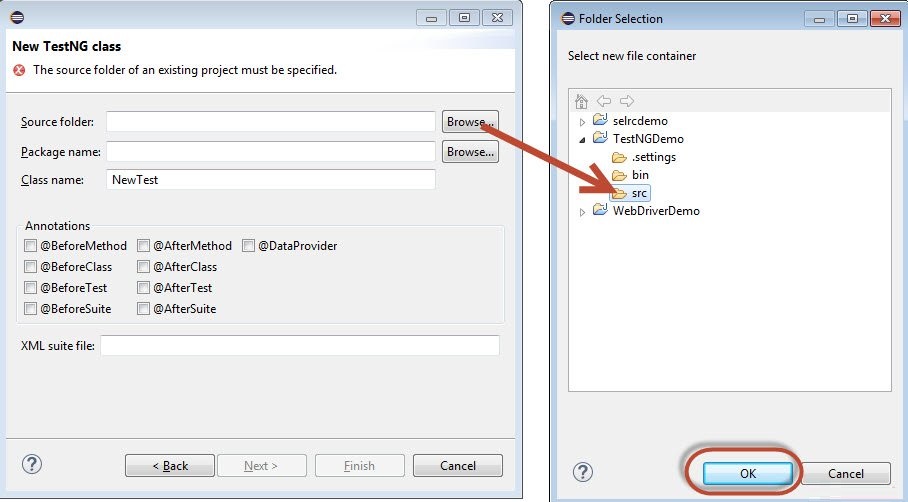
��11����ѡ��Package name����������Ȼ����Finish����
����12����Package Explorer�ʹ������ཫ������ʾ�������û���
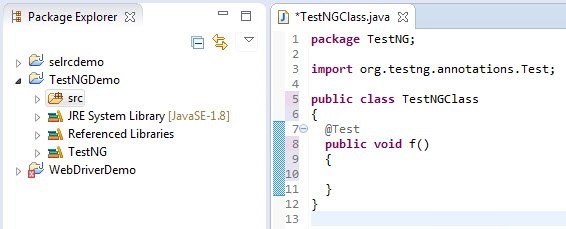
��TestNG�ĵ�һ������
����������ʹ��TestNG�����ű���Ϊ��������webdriverʹ����ͬ��ʾ���ű������ǽ�������ʾӦ�ó���www.calculator.net��ִ�У��ļ�������
������IJ��ԣ���ᷢ�֣�û��main��������TestNG�����������ִ�����̡���ʼ���������������ִ�С�@BeforeTest'����������ǡ�@Test'��Ȼ��'@AfterTest������ע�⣬������һ�����е��κ�������@Test��ע�⣬���ǡ�@BeforeTest'��'@AfterTest��ֻ�ܳ���һ�Ρ�
package
TestNG;
import java.util.concurrent.TimeUnit;
import org.openqa.selenium.*;
import org.openqa.selenium.firefox.FirefoxDriver;
import org.testng.annotations.AfterTest;
import org.testng.annotations.BeforeTest;
import org.testng.annotations.Test;
public class TestNGClass
{
WebDriver driver = new FirefoxDriver();
@BeforeTest
public void launchapp()
{
//Puts a Implicit wait, Will wait for 10
seconds before throwing exception
driver.manage().timeouts().implicitlyWait(10,
TimeUnit.SECONDS);
//Launch website
driver.navigate().to("http://www.calculator.net");
driver.manage().window().maximize();
}
@Test
public void calculatepercent()
{
// Click on Math Calculators
driver.findElement(By.xpath(".//*[@id='menu']/div[3]/a")).click();
// Click on Percent Calculators
driver.findElement(By.xpath(".//*[@id='menu']/div[4]/div[3]/a")).click();
// Enter value 10 in the first number
of the percent Calculator
driver.findElement(By.id("cpar1")).sendKeys("10");
// Enter value 50 in the second number
of the percent Calculator
driver.findElement(By.id("cpar2")).sendKeys("50");
// Click Calculate Button
driver.findElement(By.xpath(".//*[@id='content']/table/tbody/tr/td[2]/input")).click();
// Get the Result Text based on its xpath
String result = driver.findElement(By.xpath(".//*[@id='content']/p[2]/span/font/b")).getText();
//Print a Log In message to the screen
System.out.println(" The Result is
" + result);
if(result.equals("5"))
{
System.out.println(" The Result is
Pass");
}
else
{
System.out.println(" The Result is
Fail");
}
}
@AfterTest
public void terminatetest()
{
driver.close();
}
} |
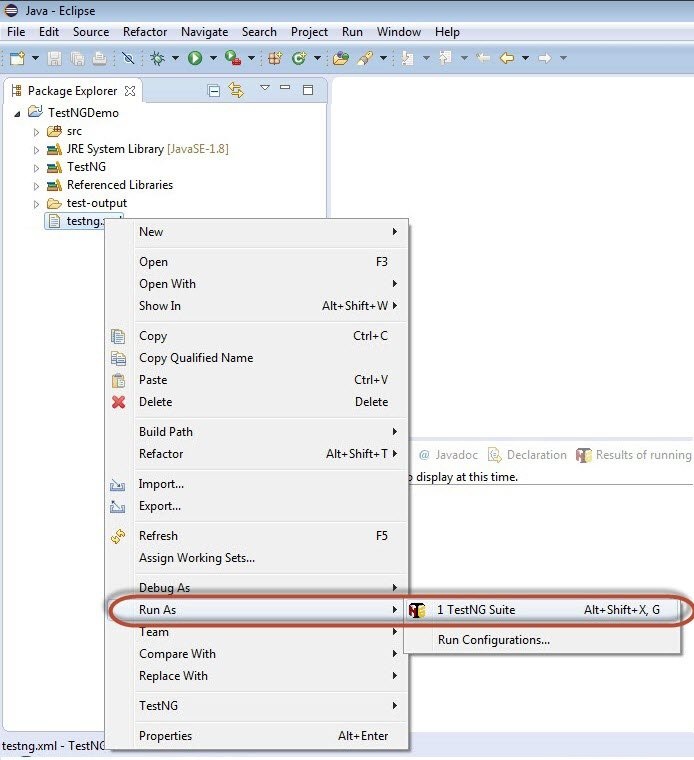
ִ��
ͨ���ڴ�����XMLִ���Ҽ�������ѡ�� "Run As" >>
"TestNG Suite"���в���ִ��
�������
����������˿���̨�������������ͼ��ʾ������̨���Ҳ��ִ��ժҪ��
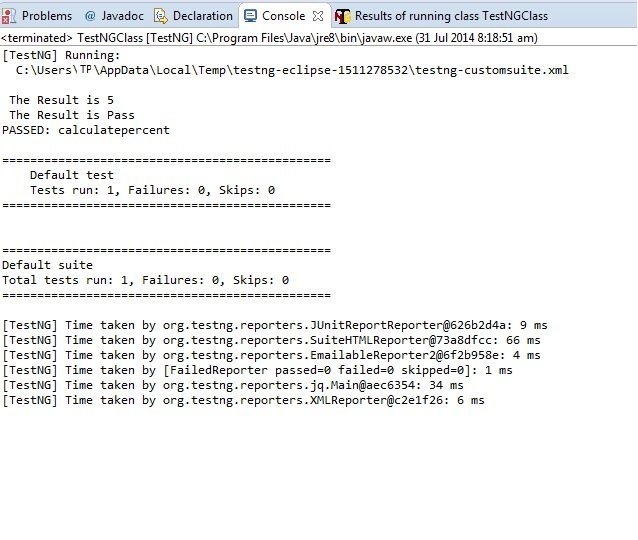
TestNG�Ľ��Ҳ���Կ����ڲ�ͬ�ı�ǩ�������HTML Report View����ť������ͼ��ʾ��

������ʾ��HTML���������ʾ��

|