|
Android有一个内置的麦克风,通过它可以捕获音频和存储,或在手机进行播放。有很多方法可以做到这一点,但最常见的方法是通过MediaRecorder类。
Android提供MediaRecorder类录制音频或视频。为了使用MediaRecorder类,首先创建MediaRecorder类的一个实例。其语法如下给出。
MediaRecorder myAudioRecorder = new MediaRecorder(); |
现在设置源,输出编码格式和输出文件。下面的语法给出。
myAudioRecorder.setAudioSource(MediaRecorder.AudioSource.MIC);
    myAudioRecorder.setOutputFormat(MediaRecorder.OutputFormat.THREE_GPP);
    myAudioRecorder.setAudioEncoder(MediaRecorder.OutputFormat.AMR_NB);
myAudioRecorder.setOutputFile(outputFile); |
指定音频源和格式以及它的输出文件之后,我们就可以调用两种基本方法制备,开始记录音频。
myAudioRecorder.prepare(); myAudioRecorder.start(); |
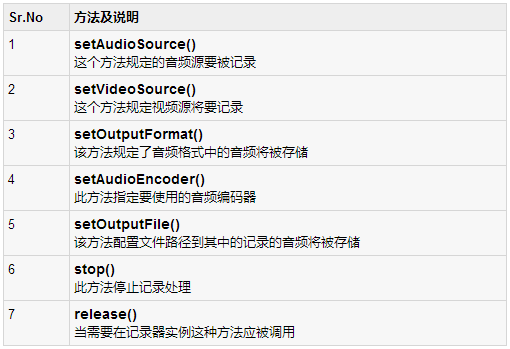
除了这些方法,还有其他的MediaRecorder类可以更好地控制音频和视频录制列出的方法。
例子
这个例子提供了MediaRecorder类捕获音频的示范,MediaPlayer类来播放录制的音频。
为了试验这个例子,需要在实际设备上运行此例子。
这里是?src/com.yiibai.audiocapture/MainActivity.java?内容
package com.example.audiocapture;
    import java.io.File;  import java.io.IOException;
    import android.media.MediaPlayer;
    import android.media.MediaRecorder;
    import android.os.Bundle;
    import android.os.Environment;
    import android.app.Activity;
    import android.view.Menu;
    import android.view.View;
    import android.widget.Button;
    import android.widget.Toast;
    public class MainActivity extends Activity {
       private MediaRecorder myAudioRecorder;
       private String outputFile = null;
       private Button start,stop,play;
       @Override
       protected void onCreate(Bundle savedInstanceState) {
          super.onCreate(savedInstanceState);
          setContentView(R.layout.activity_main);
          start = (Button)findViewById(R.id.button1);
          stop = (Button)findViewById(R.id.button2);

          play = (Button)findViewById(R.id.button3);

          stop.setEnabled(false);
          play.setEnabled(false);

          outputFile = Environment.getExternalStorageDirectory().
          getAbsolutePath() + "/myrecording.3gp";;

          myAudioRecorder = new MediaRecorder();
          myAudioRecorder.setAudioSource(MediaRecorder.AudioSource.MIC);
          myAudioRecorder.setOutputFormat(MediaRecorder.OutputFormat.THREE_GPP);
          myAudioRecorder.setAudioEncoder(MediaRecorder.OutputFormat.AMR_NB);
          myAudioRecorder.setOutputFile(outputFile);
        }
        public void start(View view){
             try {
                  myAudioRecorder.prepare();
                  myAudioRecorder.start();
            } catch (IllegalStateException e) {
           // TODO Auto-generated catch block
           e.printStackTrace();
           } catch (IOException e) {
           // TODO Auto-generated catch block
           e.printStackTrace();
          }
          start.setEnabled(false);
          stop.setEnabled(true);
          Toast.makeText(getApplicationContext(), "Recording started", Toast.LENGTH_LONG).show();
       }
       public void stop(View view){
          myAudioRecorder.stop();
          myAudioRecorder.release();
          myAudioRecorder  = null;
          stop.setEnabled(false);
          play.setEnabled(true);
          Toast.makeText(getApplicationContext(), "Audio recorded successfully",
          Toast.LENGTH_LONG).show();
     }
      @Override
       public boolean onCreateOptionsMenu(Menu menu) {
        // Inflate the menu; this adds items to the action bar if it is present.
        getMenuInflater().inflate(R.menu.main, menu);
        return true;
      }
      public void play(View view) throws IllegalArgumentException,
         SecurityException, IllegalStateException, IOException{
         MediaPlayer m = new MediaPlayer();
         m.setDataSource(outputFile);
         m.prepare();
         m.start();
         Toast.makeText(getApplicationContext(), "Playing audio", Toast.LENGTH_LONG).show();
       }
} |
这里是activity_main.xml 的内容
<RelativeLayout xmlns:android="http://schemas.android.com/apk/res/android"
       xmlns:tools="http://schemas.android.com/tools"
       android:layout_width="match_parent"
       android:layout_height="match_parent"
       android:paddingBottom="@dimen/activity_vertical_margin"
       android:paddingLeft="@dimen/activity_horizontal_margin"
       android:paddingRight="@dimen/activity_horizontal_margin"
       android:paddingTop="@dimen/activity_vertical_margin"
       tools:context=".MainActivity" >
       <TextView
          android:id="@+id/textView1"
          android:layout_width="wrap_content"
          android:layout_height="wrap_content"
          android:layout_alignParentLeft="true"
          android:layout_alignParentRight="true"
          android:layout_alignParentTop="true"
          android:layout_marginTop="32dp"
          android:text="@string/Recording"
          android:textAppearance="?android:attr/textAppearanceMedium" />
       <ImageView
          android:id="@+id/imageView1"
          android:layout_width="100dp"
          android:layout_height="100dp"
          android:layout_below="@+id/textView1"
          android:layout_centerHorizontal="true"
          android:layout_marginTop="37dp"
          android:scaleType="fitXY"
          android:src="@android:drawable/presence_audio_online" />
       <Button
          android:id="@+id/button1"
          android:layout_width="wrap_content"
          android:layout_height="wrap_content"
          android:layout_below="@+id/imageView1"
          android:layout_marginTop="67dp"
          android:layout_toLeftOf="@+id/imageView1"
          android:onClick="start"
          android:text="@string/start" />
       <Button
          android:id="@+id/button2"
          android:layout_width="wrap_content"
          android:layout_height="wrap_content"
          android:layout_alignBaseline="@+id/button1"
          android:layout_alignBottom="@+id/button1"
          android:layout_alignRight="@+id/textView1"
          android:layout_marginRight="40dp"
          android:onClick="stop"
          android:text="@string/stop" />
       <Button
          android:id="@+id/button3"
          style="?android:attr/buttonStyleSmall"
          android:layout_width="wrap_content"
          android:layout_height="wrap_content"
          android:layout_below="@+id/button2"
          android:layout_centerHorizontal="true"
          android:onClick="play"
          android:text="@string/play" />
</RelativeLayout> |
这里是?Strings.xml 的内容
<?xml version="1.0" encoding="utf-8"?>
    <resources>
       <string name="app_name">AudioCapture</string>
       <string name="action_settings">Settings</string>
       <string name="hello_world">Hello world!</string>
       <string name="Recording">Android Audio Recording Application</string>
       <string name="start">start</string>
       <string name="stop">stop</string>
      <string name="play">play</string>
</resources> |
这里是?AndroidManifest.xml?内容
<?xml version="1.0" encoding="utf-8"?>
    <manifest xmlns:android="http://schemas.android.com/apk/res/android"
        package="com.yiibai.audiocapture"
        android:versionCode="1"
        android:versionName="1.0" >
       <uses-sdk
          android:minSdkVersion="10"
          android:targetSdkVersion="17" />
      <uses-permission android:name="android.permission.WRITE_EXTERNAL_STORAGE"/>
     <uses-permission android:name="android.permission.RECORD_AUDIO" />
     <application
           android:allowBackup="true"
           android:icon="@drawable/ic_launcher"
           android:label="@string/app_name"
           android:theme="@style/AppTheme" >
        <activity
            android:name="com.yiibai.audiocapture.MainActivity"
            android:label="@string/app_name" >
           <intent-filter>
              <action android:name="android.intent.action.MAIN" />
                <category android:name="android.intent.category.LAUNCHER" />
           </intent-filter>
        </activity>
     </application>
</manifest> |
让我们试着运行AndroidCapture应用程序。启动应用程序之前显示如下窗口,选择要运行的Android应用程序的选项。
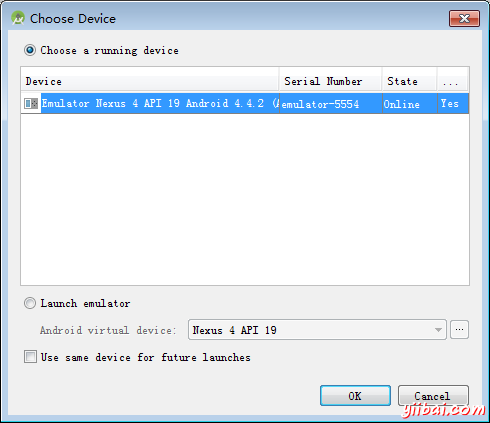
选择移动设备作为一个选项,检看移动设备将显示如下界面:
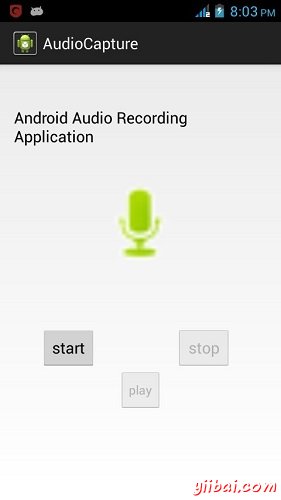
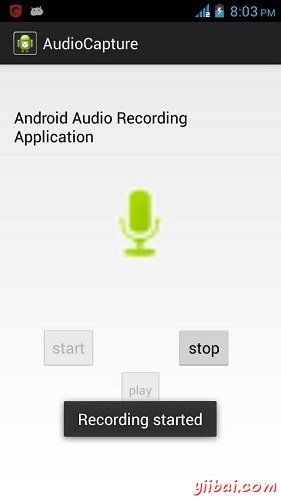
现在,在默认情况下看到"stop"和"play"按钮禁用。只需按下"start"按钮,应用程序将开始录制音频。它会显示以下画面。
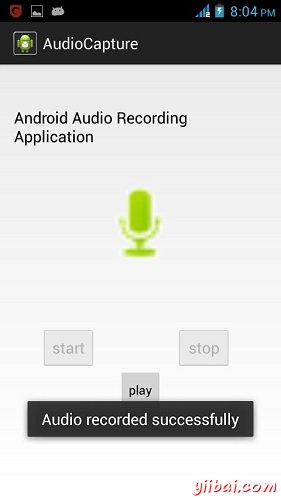
现在,只要按下"stop"按钮,它会保存录制的音频外置SD卡。当点击"stop"按钮,下面的屏幕会出现。
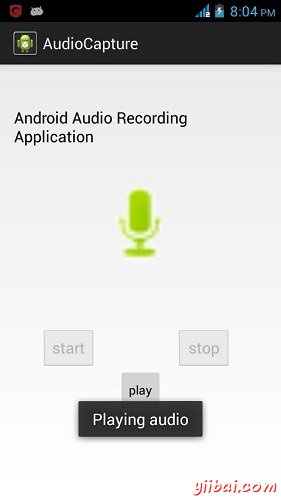
现在,只要按下"play"按钮,并录制的音频只是开始播放设备上。当点击"play"按钮,将出现以下消息。
|