|
Android的允许通过添加不同种类的处理图像效果。可以轻松地应用图像处理技术来增加某些种类的图像效果。这些影响可能是亮度,黑暗中,灰度转换等
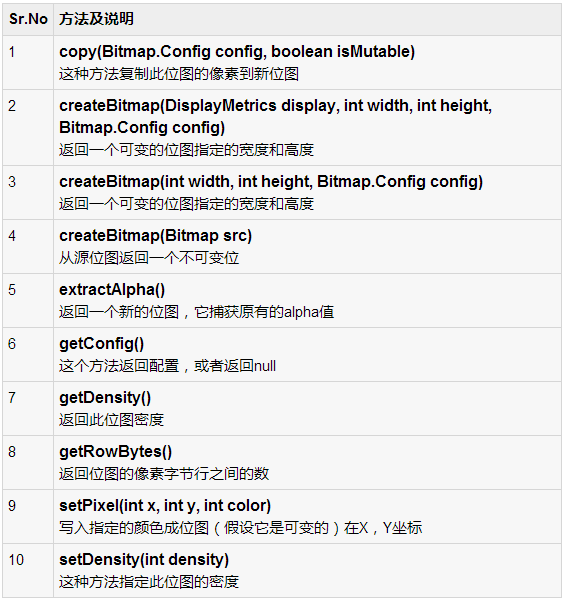
Android提供了Bitmap类来处理图像。这可以在 android.graphics.bitmap 下找到。有很多种方法,通过它可以位图 Bitmap 实例调用。如下创建的图像从ImageView的位图。
private Bitmap bmp;  private ImageView img;
    img = (ImageView)findViewById(R.id.imageView1);
BitmapDrawable abmp = (BitmapDrawable)img.getDrawable(); |
现在,我们将通过调用BitmapDrawable类的getBitmap()函数来创建位图。它的语法如下:
图像不过是一个二维矩阵。同样的方式处理位图。图像由像素组成。所以,从中得到位图的像素并应用处理它。它的语法如下:
for(int i=0; i<bmp.getWidth(); i++){
     for(int j=0; j<bmp.getHeight(); j++){
        int p = bmp.getPixel(i, j);
     }
} |
所述的 getWidth()和 getHeight()函数返回矩阵的高度和宽度。使用getPixel()方法返回像素的指定索引处。得到了像素之后可以根据需要方便地操纵它。
除了这些方法,还有其他方法,帮助我们更好地处理图像。
例子
下面的例子演示了一些对位图上的图像效果。它创建了一个基本的应用程序,让图片转换成灰度等等。
为了试验这个例子,需要在实际设备上运行此程序。
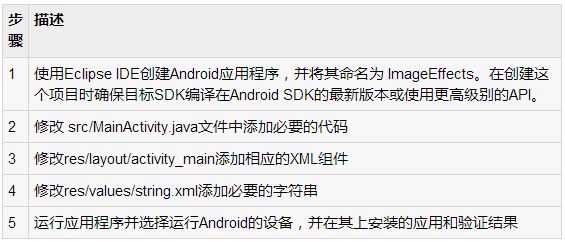
以下是修改主活动文件的内容src/com.yiibai.imageeffects/MainActivity.java.
package com.example.imageeffects;
    import android.app.Activity;
    import android.graphics.Bitmap;

    import android.graphics.Color;
    import android.graphics.drawable.BitmapDrawable;
    import android.os.Bundle;
    import android.view.Menu;
    import android.view.View;
    import android.widget.ImageView;
    public class MainActivity extends Activity {
       private ImageView img;
       private Bitmap bmp;
       private Bitmap operation;
       @Override
       protected void onCreate(Bundle savedInstanceState) {
       super.onCreate(savedInstanceState);
       setContentView(R.layout.activity_main);
       img = (ImageView)findViewById(R.id.imageView1);
       BitmapDrawable  abmp = (BitmapDrawable)img.getDrawable();
       bmp = abmp.getBitmap();
       }
       public void gray(View view){
        operation= Bitmap.createBitmap(bmp.getWidth(),
        bmp.getHeight(),bmp.getConfig());
          double red = 0.33;
          double green = 0.59;
          double blue = 0.11;
        for(int i=0; i<bmp.getWidth(); i++){
        for(int j=0; j<bmp.getHeight(); j++){
           int p = bmp.getPixel(i, j);
           int r = Color.red(p);
           int g = Color.green(p);
           int b = Color.blue(p);
           r = (int) red * r;
           g = (int) green * g;
           b = (int) blue * b;
             operation.setPixel(i, j, Color.argb(Color.alpha(p), r, g, b));
           }
        }
        img.setImageBitmap(operation);
     }
       public void bright(View view){
        operation= Bitmap.createBitmap(bmp.getWidth(),
        bmp.getHeight(),bmp.getConfig());
            for(int i=0; i<bmp.getWidth(); i++){
           for(int j=0; j<bmp.getHeight(); j++){
              int p = bmp.getPixel(i, j);
              int r = Color.red(p);
              int g = Color.green(p);
              int b = Color.blue(p);
              int alpha = Color.alpha(p);
                r = 100  +  r;
                g = 100  + g;
                b = 100  + b;
                alpha = 100 + alpha;
                operation.setPixel(i, j, Color.argb(alpha, r, g, b));
           }
        }
        img.setImageBitmap(operation);
     }
       public void dark(View view){
        operation= Bitmap.createBitmap(bmp.getWidth(),
        bmp.getHeight(),bmp.getConfig());
            for(int i=0; i<bmp.getWidth(); i++){
           for(int j=0; j<bmp.getHeight(); j++){
              int p = bmp.getPixel(i, j);
              int r = Color.red(p);
              int g = Color.green(p);
              int b = Color.blue(p);
              int alpha = Color.alpha(p);
              r =  r - 50;
              g =  g - 50;
              b =  b - 50;
              alpha = alpha -50;
              operation.setPixel(i, j, Color.argb(Color.alpha(p), r, g, b));
                }
         }
          img.setImageBitmap(operation);
     }
       @Override
     public boolean onCreateOptionsMenu(Menu menu) {
        // Inflate the menu; this adds items to the action bar if it is present.
        getMenuInflater().inflate(R.menu.main, menu);
        return true;
     }
} |
以下是XML的经修改的内容?res/layout/activity_main.xml.
<RelativeLayout xmlns:android="http://schemas.android.com/apk/res/android"
     xmlns:tools="http://schemas.android.com/tools"
     android:layout_width="match_parent"
     android:layout_height="match_parent"
     android:paddingBottom="@dimen/activity_vertical_margin"
     android:paddingLeft="@dimen/activity_horizontal_margin"
     android:paddingRight="@dimen/activity_horizontal_margin"
     android:paddingTop="@dimen/activity_vertical_margin"
     tools:context=".MainActivity" >
       <Button
        android:id="@+id/button2"
        android:layout_width="wrap_content"
        android:layout_height="wrap_content"
        android:layout_alignBaseline="@+id/button1"
        android:layout_alignBottom="@+id/button1"
        android:layout_alignParentRight="true"
        android:layout_marginRight="19dp"
        android:onClick="dark"
        android:text="@string/dark" />
       <Button
        android:id="@+id/button1"
        android:layout_width="wrap_content"
        android:layout_height="wrap_content"
        android:layout_alignParentBottom="true"
        android:layout_marginBottom="87dp"
        android:layout_marginRight="17dp"
        android:layout_toLeftOf="@+id/button3"
        android:onClick="gray"
        android:text="@string/gray" />
       <Button
        android:id="@+id/button3"
        android:layout_width="wrap_content"
        android:layout_height="wrap_content"
        android:layout_alignBaseline="@+id/button2"
        android:layout_alignBottom="@+id/button2"
        android:layout_centerHorizontal="true"
        android:onClick="bright"
        android:text="@string/bright" />
       <ImageView
        android:id="@+id/imageView1"
        android:layout_width="wrap_content"
        android:layout_height="wrap_content"
        android:layout_alignParentTop="true"
        android:layout_centerHorizontal="true"
        android:layout_marginTop="114dp"
        android:src="@drawable/ic_launcher" />
</RelativeLayout> |
以下是res/values/string.xml. 的内容
<?xml version="1.0" encoding="utf-8"?>
    <resources>
       <string name="app_name">ImageEffects</string>
       <string name="action_settings">Settings</string>
       <string name="hello_world">Hello world!</string>
       <string name="gray">Gray</string>
       <string name="bright">bright</string>
       <string name="dark">dark</string>
</resources> |
以下是 AndroidManifest.xml 文件的内容
<?xml version="1.0" encoding="utf-8"?>
    <manifest xmlns:android="http://schemas.android.com/apk/res/android"
     package="com.yiibai.imageeffects"
     android:versionCode="1"
     android:versionName="1.0" >
    <uses-sdk
     android:minSdkVersion="8"
     android:targetSdkVersion="17" />
       <application
        android:allowBackup="true"
        android:icon="@drawable/ic_launcher"
        android:label="@string/app_name"
        android:theme="@style/AppTheme" >
        <activity
           android:name="com.yiibai.imageeffects.MainActivity"
           android:label="@string/app_name" >
           <intent-filter>
              <action android:name="android.intent.action.MAIN" />
                <category android:name="android.intent.category.LAUNCHER" />
           </intent-filter>
        </activity>
     </application>
</manifest> |
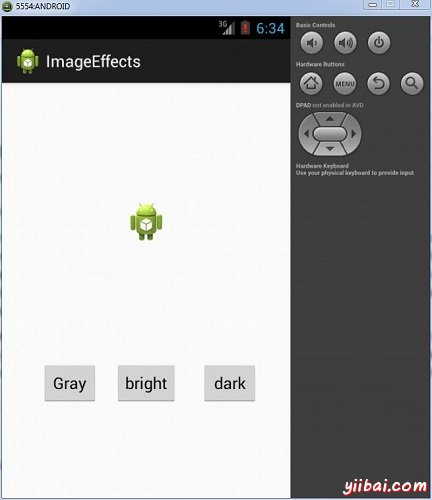
让我们试着来运行修改图像效果的应用程序。假设已经创建了AVD在做环境设置。安装程序在AVD并启动它,如果一切设置和应用程序都没有问题,它会显示以下仿真器窗口:
现在,如果看手机屏幕,会看到Android的图像以及三个按钮。
现在,只需选择灰色按钮,将图像转换成灰度和将更新UI。它如下所示:
现在点击光明(bright)按钮,将某个值添加到图像的每个像素,从而使亮度的错觉。它如下所示:?
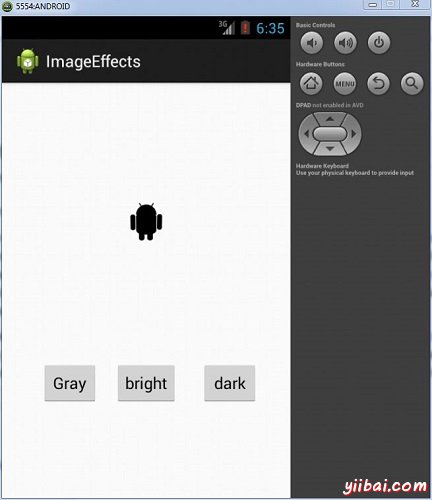
现在轻触dark按钮,将减去某个值的图像的每个像素,从而使暗的错觉。它如下所示: ?

|